Hier leer je alles over ballonvouwen
.jpg)
Stap voor stap ballonvouwen -- Step by step balloontwisting
ingezonden door ballonnenvriend Willem
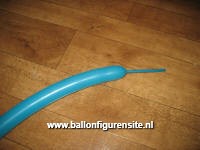
1: Begin met een leeg stuk aan het staarteinde van plm. 12-15 cm.
2: Maak een kleine bubbel.
3: Maak hiervan een pinchtwist.
4: Kleine bubbel (2 inch).
5: Pinchtwist.
6: Kleine bubbel terug.
7: Vastmaken aan eerste pinchtwist.
8: Kleine bubbel, pinchtwist.
9: Kleine bubbel terug en een pinchtwist.
10: De laatste pinchtwist vastmaken in het midden. De kop is klaar.
11: Maak een buikdraai.(grote bubbel, grote bubbel dan in elkaar twisten, druk derde grote bubbel er door)
12: Ziet er nu zo uit.
13: Met het restant maak dat twee bubbels als pootjes. Heb je nog wat over laat dit dan als staart achter de pootjes uitsteken.
14: Met wat waterballonnen (of overgebleven stukje restballon) maak je eventueel wat ogen.
15: En klaar is de uil.
_small.jpg)
_small.jpg)
_small.jpg)
_small.jpg)
_small.jpg)
_small.jpg)
_small.jpg)
_small.jpg)
_small.jpg)
_small.jpg)
_small.jpg)
_small.jpg)
_small.jpg)
_small.jpg)
1: Start with a blank piece at the tail end of approx. 12-15 cm.
2: Make a small bubble.
3: Make this a pinch twist.
4: Small bubble (2 inches).
5: Pinch Twist.
6: Small bubble back.
7: Attaching to first pinch twist.
8: Small bubble, pinch twist.
9: Small bubble back and a pinch twist.
10: The final pinch twist fastening in the middle. The head is finished.
11: Create a bubble roll.
12: Looks like this.
13: With the remainder make that two bubbles as legs. Do you remember what leaves it as tail behind the legs protrude.
14: With some water balloons (or balloon remaining piece of rest), you are possibly to make some eyes.
15: And there it is the owl.

