Hier leer je alles over ballonvouwen
Maak stap voor stap ballonfiguren -- Make step by step balloonfigures
ingezonden door Willem
1: Blaas de Q260 op to een 5 cm van het einde. Maak een kleine bubbel en een grotere.
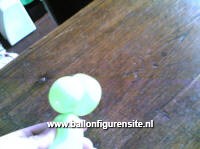
2: Verbind de knoop met de onderkant van de tweede bubbel. Ik doe de knoop er dan altijd tussen de twee bubbels door, dan kan hij niet losschieten. Druk de kleine bubbel wat naar beneden, dit is nu de kop van de papegaai.
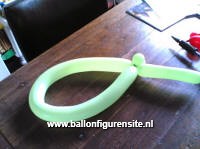
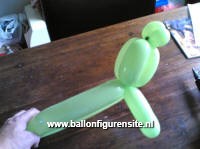
3: Maak een bubbel van 20 cm aan het eind van de ballon en draai dit in het punt waar je de knoop hebt gedraaid.
4: Vouw het eind terug en pak alles in 1 hand.
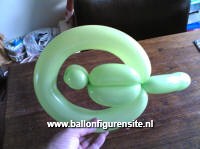
5: Draai ongeveer 10 cm van de verbinding waar de knoop zit de drie delen in elkaar.
6: Duw het gedeelte wat de papegaai is in de lus en de staart eronder.
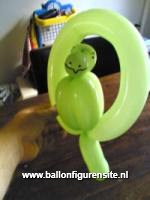
7: Teken een oog, snavel en neusgaten en klaar.
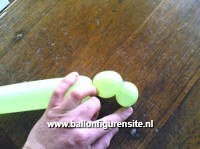
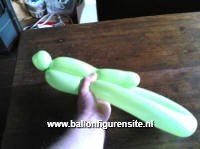
1: Blow up the Q260 on to a 5 cm from the end. Make a small bubble and a larger one.
2: Connect the node with the bottom of the second bubble. I do always the knot between the two bubbles through, he can not fly off. Press the little bubble that down, this is now the head of the parrot.
3: Make a bubble of 20 cm at the end of the balloon and twist it at the point where you've turned the knot.
4: Fold the end back and get everything in 1 hand.
5: Turn about 10 cm from the junction where the knot is the three parts together.
6: Push the part that the parrot is in the loop and tail underneath.
7: Draw an eye, beak and nostrils and ready.

