Hier leer je alles over ballonvouwen
Maak stap voor stap ballonfiguren -- Balloon twisting step by step
1: Blaas een ballon op, maar laat 20 cm leeg.
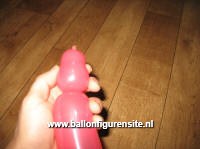
2: Maak een kleine blaas.
3: Maak een grote blaas en vouw deze dubbel.
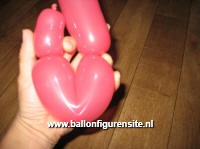
4: Draai de grote blaas vast.
5: Duw de kleine blaas in de grote blaas.
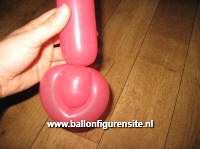
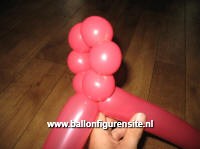
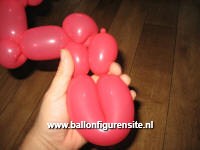
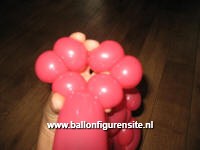
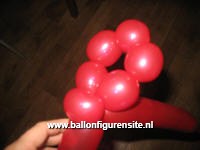
6: Maak een grote blaas.
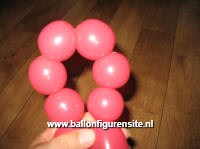
7: Maak 6 kleine blazen. zie onderaan de tip voor een andere stuur.
8: En draai deze vast.
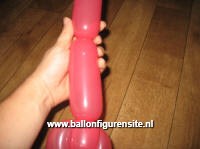
9: Maak een middelgrote blaas en een kleine blaas.
10: Oordraai de kleine blaas.
11: Maak een middelgrote en een kleine blaas.
12: En oordraai deze.
13: Van de rest van de ballon maak je een kleine blaas, een grote blaas en een kleine blaas. vouw de grote blaas dubbel.
14: De kleine blaas duw je weer in de grote blaas.
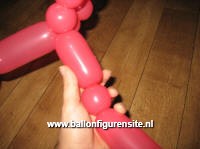
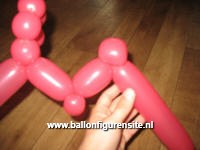
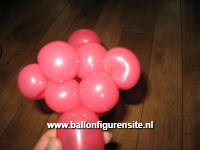
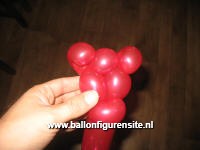
15: Ziet er nu zo uit.
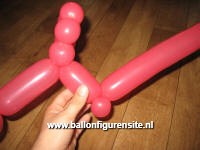
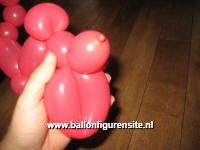
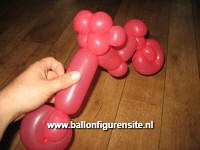
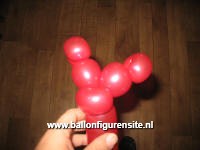
16: Het begint al op een motor te lijken.
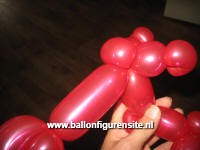
17: De 6 kleine blazen van het stuur deel je door midden. De aller-linkse en de aller-rechtse blaas oordraai je.
18: Je hebt dan twee keer drie bolletjes.
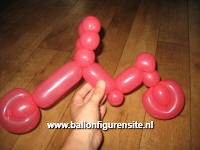
19: De linkse en de rechtse bolletje(die je een oordraai hebt gegeven) duw je naar de achterkant.
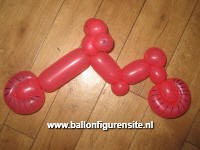
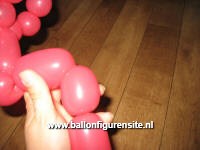
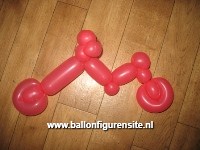
20: Je krijgt dan een stuur.
21: En klaar is je ballonfiguur de motor.
22: Teken de banden er nog op.
Voor een mooier stuur kreeg ik de volgende tip van Hannes
1: Ipv 6 bolletjes voor het stuur, maak je 5 bolletjes en dan pinch twist je nog een 6de bolletje bij als koplamp (tussen het stuur en de voorstang).
2: 2de en 4de pinch twist zoals het gezicht van beer en dan de 3e lekprikken.
3: Zo heb je een stuur.
4: ziet er zo uit.
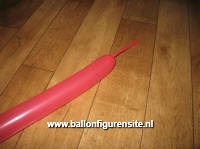
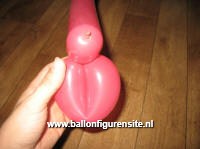


1: Blow up a balloon, leaving 20 cm empty.
2: Make a small bubble.
3: Make a large bubble and fold it in half.
4: Attach the large bubble.
5: Push the small bubble in the large bubble.
6: Make a big bubble.
7: Make 6 small bubbles. see below a tip for another steer.
8: And tighten.
9: Create a medium-sized bubble and a small bubble.
10: Eartwist the small bubble.
11: Create a medium and a small bubble.
12: And eartwist.
13: From the rest of the balloon to make a small bubble, a large bubble and a small bubble. fold the large bubble double.
14: Push the small bubble into the large bubble.
15: Looks like this.
16: It starts to look like on a motorcycle.
17: Part the 6 small bubbles of the wheel in half. Eartwist the most-left and the most right bubble.
18: You have two times three balls.
19: The left and right ball (which you have given a eartwist) push it to the back.
20: You get a steering wheel.
21: And there you have your balloon figure the motor.
22: Draw the tires still on.
For better control, I got the following tip of Hannes
1: Instead of 6 balls for the wheel, you have 5 balls and then pinch twist. when you have a 6th bullet as headlight (between the wheel and the rod).
2: 2nd and 4th pinch twist like the face of bear and then the 3rd pop.
3: So you have a steering wheel.
4: looks like this.

